How To Mount A Lakehouse and Identify The Mounted Lakehouse in Fabric Notebook
Code to get a list of mounted Lakehouses and mounting additional ones
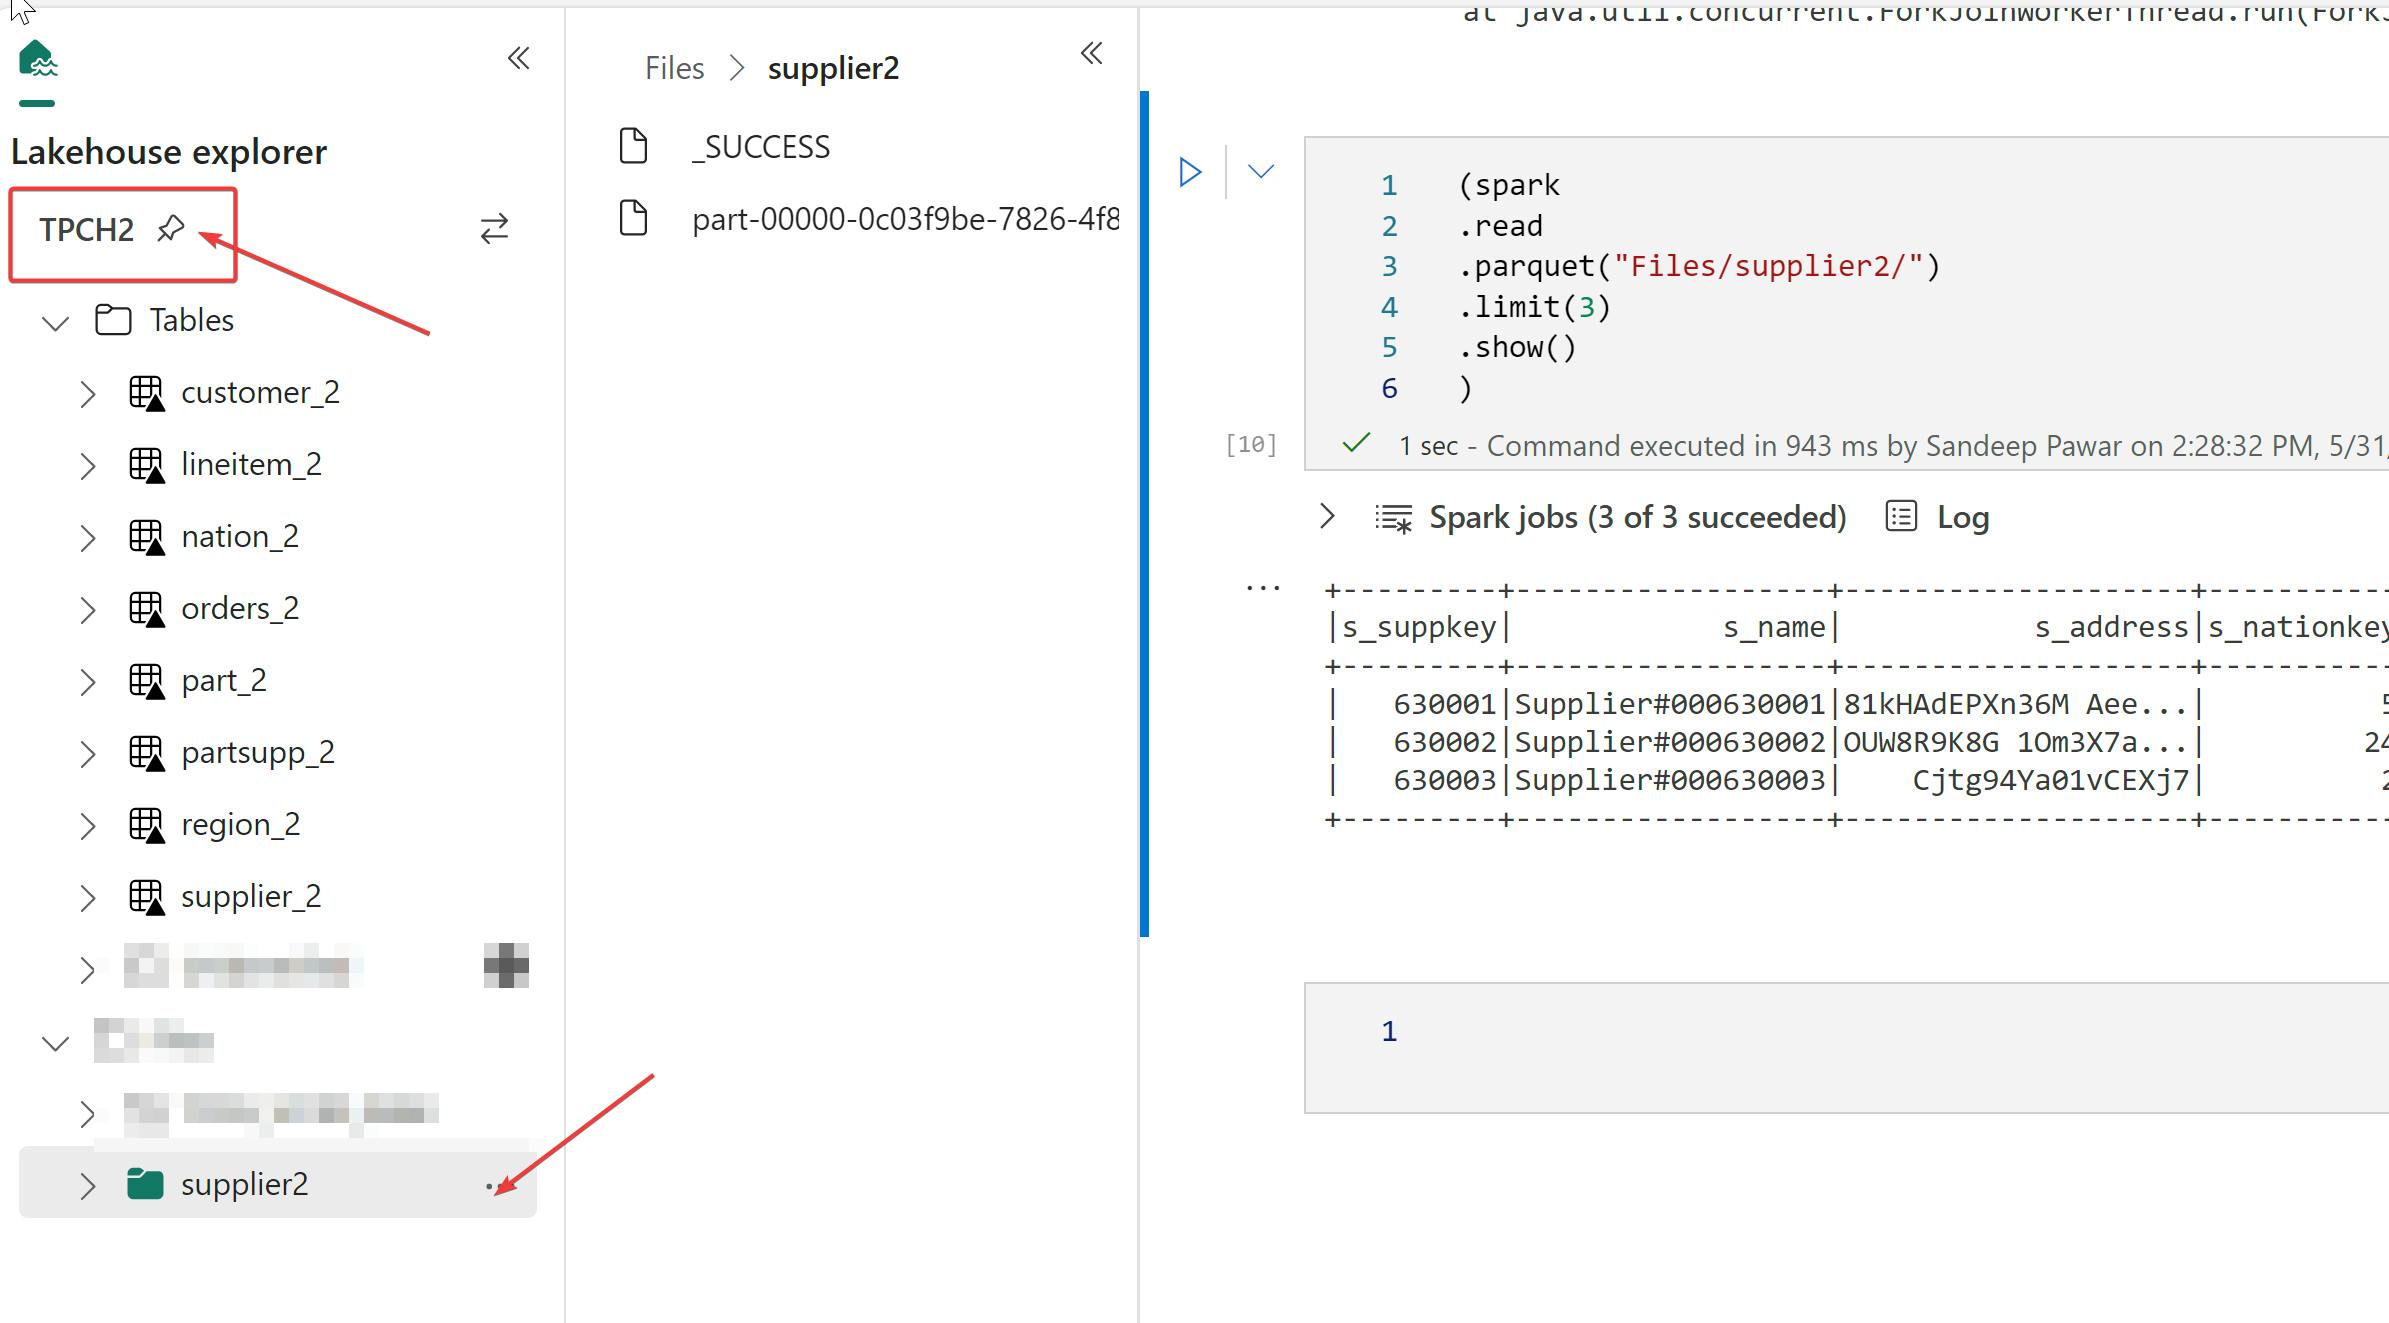
Let's say you receive a notebook from someone that reads parquet file from some location in the OneLake. The code used to read the parquet is :

How do you know where this parquet file folder was in the OneLake? Which workspace and which Lakehouse ? The file path shown above is called a relative file path. When you have a Lakehouse that is 'mounted' , i.e. attached to a notebook, you can use such file paths instead of using the full abfss://... file paths of the container/folder location in the lake. The Lakehouse mounted to the notebook can be seen on the left in the Lakehouse explorer section.

But, if you received the notebook from your colleague, the Lakehouse won't be visible and hence you won't be able to figure out where the data was read from or saved to.
We can identify the mounted lakehouses and the respective mount points by using the msspsarkutils library.
from notebookutils import mssparkutils
mssparkutils.fs.mounts()
This will return the list of Lakehouse mounted to the notebook. Mounting simply allows you to use local file system paths.

To get the abfss path of the default Lakehouse, use:
#To get the default lakehouse attached to the notebook

for mp in mssparkutils.fs.mounts():
    if mp.mountPoint == '/default':
        print(f"Default Lakehouse is: {mp.source}")

The abfss path that is returned is in this format abfss://<workspace_id>@onelake.dfs.fabric.microsoft.com/<lakehouse_id> . This will allow you to identify the mounted Lakehouse and the workspace.
I highly recommend printing the lakehouse, workspace ids at the start of the notebook for traceability.
Note that it is possible to mount additional Lakehouses if the data resides in more than one Lakehouse.
Mounting A Lakehouse
To mount another Lakehouse in the notebook, use the below code. It should be noted that Lakehouses mounted at the runtime like this will not be visible in the lineage view, at least for now.
mssparkutils.fs.mount("abfss://<workspace_id>@onelake.dfs.fabric.microsoft.com/<lakehouse_id>", "<mountPoint>") #mountPoint such as '/lakehouse/default'
After mounting, I am able to see the newly mounted Lakehouse and the scope as "job" instead of the "default_lh"

Note that you do not need to mount a Lakehouse for reading and writing with spark. You can use the full abfss path. However, mounting is required for pandas as pandas requires local file path. Thanks to Qiaxiao who is the developer for this feature in Fabric.
You can use below code snippet to dynamically mount any lakehouse or warehouse in a notebook and query the files and tables :
import os
import pandas as pd

workspaceID = "<>"
lakehouseID = "<>"
mount_name = "/temp_mnt"

base_path = f"abfss://{workspaceID}@onelake.dfs.fabric.microsoft.com/{lakehouseID}/"
mssparkutils.fs.mount(base_path, mount_name)
mount_points = mssparkutils.fs.mounts()
local_path = next((mp["localPath"] for mp in mount_points if mp["mountPoint"] == mount_name), None)

print(local_path)

print(os.path.exists(local_path)) #check if location exists
print(os.listdir(local_path + "/Files")) # for files
print(os.listdir(local_path + "/Tables")) # for tables

df = pd.read_csv(local_path + "/Files/"+ "<file_name.csv>")
To learn more about mounting and other patterns, you can refer to this documentation.
